Community Corner
Craft of the Week: Back to School Book Covers
Custom covers are just a few folds away! Use this guide to add your personal touch to your boring old books.


Crafts are a great way to exercise your artistic side but they are also very useful at bringing people together.
Each week, we will post a simple and easy project for your enjoyment. This is a great opportunity for you to reconnect with your friends and family while enjoying a weekly craft night.
Custom Book Covers
Books are an important source of knowledge and understanding. It is our duty to take care of them, especially those on loan from our public schools. Covers are an easy way to protect books from everyday wear and tear, plus add some fun and flare!
Find out what's happening in Cerritos-Artesiawith free, real-time updates from Patch.
What You Need
- Book
- Wrapping paper
- Scissors
- Ruler
- Clear tape
Step 1
Open your book and lay it down on the wrapping paper. Cut your wrapping paper down to size so that there is approximately 3 inches excess on either size of the book and approximately 2 inches excess above and below.
Find out what's happening in Cerritos-Artesiawith free, real-time updates from Patch.
Step 2
Fold up the excess paper up from the bottom to make a light crease. Repeat for the top of the book. Take the book off the paper, and fold along the creases for the entire width of the cover so that the cover is now as tall as your book.
Step 3
Place the book at the center of the cover. Wrap the cover around the book so that the two ends of the cover are aligned.
Step 4
Fold the excess over the front cover of book. If this flap is excessively long (this will depend on the size of your book), you can cut some of the excess off.
Step 5
Open the book and slide the front cover of the book into the flap made by step 4 until you stop at the crease.
Step 6
Close the book and pull the paper so that the front cover sits snugly.
Step 7
Fold the remaining paper around the back cover of the book, make a crease, and slide it into the fold as you did to the front cover of the book.
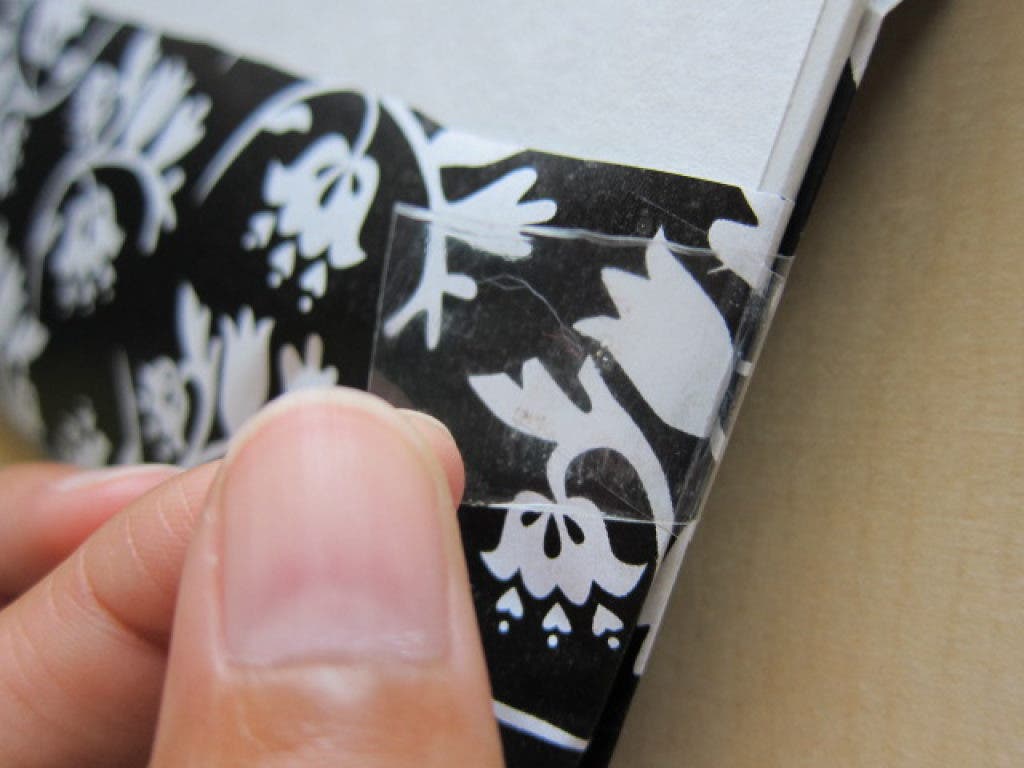
Step 8
Add tape to secure the folds on the front and back of the book as needed.
*****************************************************************************
Fun Tip: This method can be used to cover books with any type of sturdy paper product. You can recycle your paper grocery bags into rustic book covers. You can also add embellishments to further customize your cover. This is a great way to label or decorate your book covers.